Documentation Rules OK!

I’ve spent the last two days at the MIMSY UK User Group meeting, a gathering of people from different museums who use the collections management database MIMSY XG, to learn more about the system and how other museums use it to document their collections. It has been very interesting, and has left me thinking a bit about documentation in general…

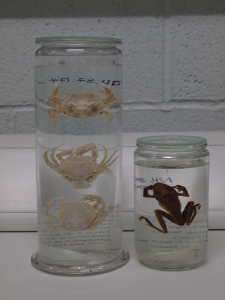
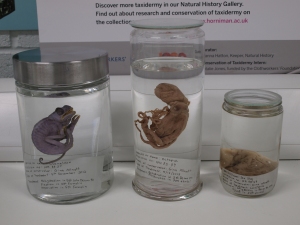
Firstly, an admission/confesssion: when I started volunteering in a museum, back in 2007, I wanted to be a curator. A natural history curator, because that is my educational background. But also because I didn’t really know what other jobs were available in museums…I knew what a preparator was from my Palaeobiology MSc studies, but I had no idea what a conservator was, and no concept at all of what the term ‘documentation’ meant in a museum context. I think I had some woolly idea that collections were catalogued in a Victorian-style ledger, and that’s all you needed.

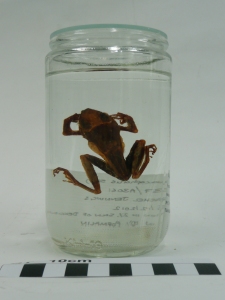
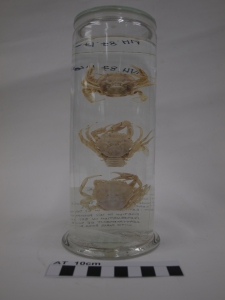
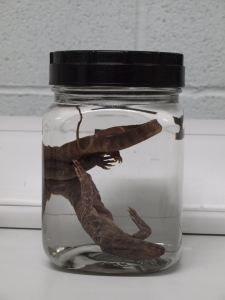
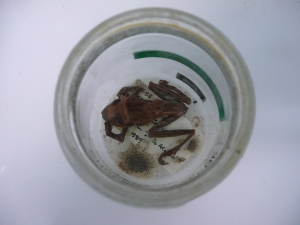
Seven years later, and documentation is almost all I do. I haven’t worked with a natural history collection in at least two years. And I do miss it, because zoology is my first love, but the more I learn about documentation, and the more I understand its importance, the more passionate I become about it! I think that’s partly because I have the right sort of pedantic mind that wants everything to be neatly organised, and partly because of my scientific background. In science, as in documentation, data is everything. The quality of your output depends on the quality of your data input. If you do not have data on your objects, then you cannot generate information about them, and you cannot interpret them for your audiences. People in our department are sometimes referred to as ‘OCD’ or ‘anal’, in a vaguely disparaging way, but I don’t think that’s fair. As museum staff, we are the custodians of our collections and the mediator between our objects and our audiences: we present objects, we build narratives around them, we use them to represent histories or ideas. And we can’t do that if we don’t know precisely what they are, where they came from, and how we acquired them. Documentation sits at the heart of everything that museums do: without information, without data, our collections are of little value.

And without this data, we would not be fulfilling our legal obligations to our collections: we need to know the history of our objects to prove their ownership, to know that they were legally collected or imported, to be accountable for our holdings, and to provide for their security. Our database technology now allows us to track everything that happens to an object, including damage and conservation work, where they go (whether that is just a change of location within the stores, or a loan to the other side of the world), and how they are used, be that as part of an exhibition, community event, or academic research project. Long gone are the days of the leather-bound ledger!

Adjusting to Anthropology

It’s been quite an adjustment over the past year, as a zoologist, to suddenly find myself working in an anthropology collection. I’d be the first to admit that I know next to nothing about the various cultures and peoples of this world, and would probably struggle to point to the places that many of our objects are from on a map.

But what I’ve discovered is that I love objects, no matter what they are. I may not always appreciate the anthropological significance of the objects we work with, but I love their artistry and ingenuity, being able to examine their construction and compare them with objects of a similar function from all over the world. Our collections are stored systematically by type rather than geographically, so I get to compare the incredibly varied forms of charms used to ward off sickness, and the striking similarity in the design of mole traps from different countries. It turns out there are many ways to fight disease, but only one way to trap a mole!

And my work is not completely divorced from my subject specialism; a huge proportion of our anthropology collection is made from animal materials, and I am learning a huge amount just from examining them under a hand lens. I can now confidently distinguish bone from ivory or antler, identify worked horn, claws, teeth, sinew and baleen (which I was surprised to learn was historically used quite commonly in North America to make fishing lines!), and I am constantly amazed at the infinite variety of forms these materials can take at the hands of a skilled craftsperson.

Plus, there can’t be many workplaces in which a debate about the best method of trapping a giraffe is considered perfectly normal staffroom conversation!

I love my job.

Showing Off

It seems I’m a glutton for punishment! Despite my general dread and fear of public speaking, I’ve signed myself up for next’s week’s Museums Showoff event in Camden on the 14th May – an evening of comedy and wonder in which 1o people get up on stage and are allowed to talk for 9 minutes each about museum-related things. I will be doing a run-down of some of my favourite things that we’ve found in the Horniman Museum‘s stores so far during the Anthropology collections review.

This time the venue is The Black Heart pub (next to Camden Town station). Doors open at 7pm, show starts at 7.30. I should hopefully be on in the first half. It should be a good night!

The March of Progress

The review of the museum’s Anthropology collections continues apace. We have seen many thousands of objects already, and this week we finished one room of the store!

Ahem. That is, we finished the food-related items in one room of the store. As we are moving through the collections thematically, rather than starting in one place and just doing everything, I think it will be a long time before we actually finish finish any one area. However, this still represents significant progress, as we have done the objects relating to food processing (cutlery, strainers, graters, corers, chopsticks, teapots, frying pans, ovens (yes, we have a couple!))… It was very satisfying to be able to put the last ‘Bay Completed’ label up, having started the room working on spoons several months ago!

Next, the Food & Feasting team will move on to objects relating to hunting, trapping, and fishing, which should be interesting. We have a LOT of beautiful fish hooks. And arrows. Many arrows. Meanwhile, the team exploring Magic & Religion (which I moved back down to yesterday) is working on objects to do with religious and seasonal festivals – easter eggs, christmas decorations, corn dollies and the like. Yesterday I found an adorable Christmas tree decoration made of silver cardboard in the shape of a mouse wearing a dress! And a Polish dough figure of a farmer surrounded by geese, representing the new summer (which you can see on our Tumblr page). I even had a go at making some salt dough figures a little while ago, inspired by the amazing dough animals we found in the collections. Mine weren’t quite as good as these, but it was fun to try out an old craft. It’s amazing the things you learn working in a museum!

Mutants and Mongrels

On Saturday I spent a sunny morning with the lovely folk of the London Bird Group (part of the LNHS) out at Walthamstow reservoirs, looking at female ducks.

OLYMPUS DIGITAL CAMERA

Why female ducks, specifically? Because they are much duller than the showy males, and are often overlooked. They are also sometimes harder to identify due to their drabness, especially from a distance.

The first ducks we saw were pochard. The males have grey bodies and very distinctive bright red heads, while the females are a much more muted grey-brown mottled colour. We also had the privilege to spot teal, goldeneye, goosander, gadwall (at a great distance!), tufted duck, and of course the ubiquitous mallards.

Except that there was something different about some of the mallards at Walthamstow…one of the first birds we saw was very dark brown, with white on its head and breast. This sparked a debate about whether it was a hybrid, or just an odd colour mutation. Later on we also saw another duck with this colouring, as well as one with the normal green head but an unusally dark brown body. I did a little Googling on the subject when I got home (as you do) and it turns out that, while mallards can and do hybridise with a whole range of other duck species, the birds we saw are actually examples of what are often referred to as ‘manky mallards’: the colourful result of wild mallards interbreeding with domestic ducks (which are the same species). This sort of thing seems to go on a lot, and it’s possible to see mallards with all sorts of interesting colouration due to genes introduced from the different breeds of domestics. We speculated that the dark brown ducks with the white bib that we saw were probably females, while the green-headed, brown-bodied bird was clearly a male.

The hybird/colour morph debate continued as we carried on walking and began observing geese. Both greylag and Canada geese can be seen at Walthamstow reservoirs, and there is clearly some interbreeding going on between these two species:

OLYMPUS DIGITAL CAMERA

The bird on the left is a standard Canada goose. His friend on the right, however, is brown, with orange legs and an orange-black bill. He has the dark neck of a Canada goose, but clearly owes much of his colouration to a greylag parent.

For comparison, these two chaps are greylags:

OLYMPUS DIGITAL CAMERA

But, again, there’s something slightly odd here. The one on the right has some white on the face and a white ring around the eye, which is absent on the normal goose to the left. It’s possible that this is a hybrid greylag x greater white-fronted goose, but then again it could just be an interesting colour morph! Without DNA from the birds it is very hard to tell which is the case.

We also saw other interestingly-coloured geese that were leucistic (reduced pigmentation caused by a recessive allele), including a Canada goose with speckles of white on its head and neck, and another with an entirely white head (but we only saw it from a distance, so it could also have been a hybrid!).

The walk may have begun as a guide to identifying much-ignored female ducks, but the reservoirs’ more unusual feathery residents added some extra interest to the day!

It’s, like, ten thousand spoons…

…OK, 10,000 might be a bit of an exaggeration, but we do have a LOT of spoons in our collection. And over the past several weeks I’ve seen most of them. We are currently reviewing the anthropology collections of the museum (which involves checking the documentation of the objects and photographing them), and doing so thematically – the first two themes that our teams are looking at are Magic and Food. I am currently on the team looking at food, and what did we find in Bay One, Shelf A? Spoons. Lots of spoons, from all over the world.

And I’ve been surprised at how interesting it has been…some of the spoons aren’t much to look at, but some of them look like this! We took many, many photos of this spoon, and still they don’t quite capture the intricacy of the carving or the glory of the whole object. These two little beauties from India are also some of my favourites. They are made of brass, with scorpion-shaped handles! They are both different as well – one has his legs bent under him so that he stands up, and the other has his tail raised to strike!

When we have time, we’ve been trying to put some of our favourite things on the museum’s new(ish) Tumblr page for all the world to see. It’s been quite popular so far, and it’s been fun to see the reaction to our objects.

I feel like I’ve used the word ‘spoon’ too many times in this post. But I’ve lost the ability to talk about anything else now – I am immersed in a world of spoons (at least until we finish the next couple of shelves and get on to knives…).

A World in White

Real snow is something of a rarity in London. So when it does come, it always seems to come as a surprise. It has been snowing steadily all day; small, fine flakes that don’t loook like much, but that, if given enough time, can transform the world into a blanket of white. I decided to go for a walk in the snow this afternoon, so I put on my trainers, walked out the door…and on discovering that I was standing in ankle-deep snow, went back inside and changed into my wellies.

I wandered across Peckham Rye Common, amused by all the giant snowmen that were in the process of being erected – and demolished – and into the park, to see how the birds were faring in this chilly weather. Quite well, as it turns out. The usual contingent of mallards, coots, moorhens, tufted ducks and Canada geese were well fed, and had been joined by a large number of black-headed gulls, a stately grey heron, and an opportunistic robin.

OLYMPUS DIGITAL CAMERA

OLYMPUS DIGITAL CAMERA

While the birds on the pond are being taken care of by kindly locals with bags of grain and bread (although bread is actually not good for most birds), some other birds are clearly struggling…most sources will tell you that you would be very lucky to ever catch sight of a woodcock on the ground, but yesterday morning there was one in my tiny urban scrap of garden! I’m asuming that it came from Peckham Rye Park, as there is a wooded area there, but it must have been hungry to start foraging in a space as open and dangerous as a garden. Luckily for the woodcock, the cat didn’t even notice it was there, and it soon flew off again (EDIT: I’ve been informed by a bird expert that the woodcock may in fact have flown all the way from Russia before landing in my garden!).

I took lots of photos in the park. Here are just a few of them:

OLYMPUS DIGITAL CAMERA OLYMPUS DIGITAL CAMERA OLYMPUS DIGITAL CAMERA OLYMPUS DIGITAL CAMERA OLYMPUS DIGITAL CAMERA

Fun With Fluids: Days Three & Four

Yesterday was a slightly slower day than intended, but I did manage to finish preserving both the frog and lizard and get them into their final solution of 80% IMS, and then mounted the frog on his backplate. Which was an odd experience – I took textiles GCSE, but it did not prepare me for threading a frog! With a very large, curved needle and monofilament thread. He did look good when he was finished, despite still being a little crunchy – the rehydration process didn’t seem to have much effect on his appearance.

P1110914

At the end of the day I managed to prep the jar and glass backplate for the harbour crabs, so that I had everything ready this morning to crack on with mounting them. Tying them to the backplate was a fairly quick job, but then came the harder task of reattaching the stray claws and legs with glass needles. I first had to decide which crab which limb belonged to, and then exactly where each limb should go. It took quite a long time, but I got there in the end!

OLYMPUS DIGITAL CAMERA

There are still a few more limbs missing, but they weren’t in the jar with the specimens so must have been lost long ago. Once in their nice new jar, though, the crabs looked much happier.

OLYMPUS DIGITAL CAMERA

Sadly, by the time I’d finished mounting the crabs, and had sealed the jars of my finished specimens, I didn’t have time to finish the lizard. I had the jar prepped, and all ten holes drilled in the backplate, but I didn’t have time to mount it. One of our conservators has offered to finish it for me tomorrow, and I left her with the worst diagram of a lizard ever drawn to show her how I had planned to pose the lizard, which I hope will help her to sew him to the backplate in the right position. He’ll probably end up looking much better than if I’d done it!

Poor little Varanus waits patiently for a new jar

Poor little Varanus waits patiently for a new jar

There has been a huge amount to take in this week, as there are so many different processes involved in restoring dried-out specimens, and I’m now quite exchausted. But I am really pleased with the results of my specimens, and I’ve learned a whole host of new skills that I feel confident I could put to good use in the future if someone put a shrivelled specimen in front of me.

If you have wet-preserved specimens in your collection that you don’t know what to do with, or don’t think you can rescue, I’d highly recommend going on Simon’s fluid preservation course – I was amazed at how well all of the specimens we worked on this week came out. They all started as dry, sad-looking husks, and by the end of the week most of them looked ready to go on display!

 Before: P1110830 P1110826

After:OLYMPUS DIGITAL CAMERA
OLYMPUS DIGITAL CAMERAChameleon, octopus (named Little Chulhu) and sea slug, prepared by Gina

Fun With Fluids: Day Two

Today began with us checking our specimens in their baths of Decon-90. My harbour crabs were declared done and ready for fixation, but the tree frog was still rather stiff and unresponsive, so he went back on the hotplate to cook a little longer.

‘Fixing’ specimens involves bathing them in a fixative, in this case formalin (a dilute solution of formaldehyde dissolved in water), which stabilises tissues by binding to amines in protein, making them less soluble and mobile. Most specimens also need to be injected with formalin, to ensure that it penetrates the whole body and the internal organs don’t start to degrade. My crabs did not need injecting, as the formalin could get inside the carapace fairly easily to reach the tissues.

P1110859

Here you can just about see the glass microscope slides being used to force my still floaty crabs beneath the surface of the formalin to make sure that it penetrates evenly.

While our specimens were busy fixing, we went for our morning’s lectures, which included information on the various jar sealants that have historically been used and which one is likely to come across in a museum collection, mounting pelagic specimens using monofilament wire and glass backing plates, and also information on dealing with fluid-preserved botanical specimens.

Next it was back to the lab, where my frog was finally supple enough to be fixed in formalin, and my crabs were ready for the next stage. Once fixed, specimens are usually then transferred into alcohol, which acts as a preservative and prevents them decaying over time. A solution of 70 – 80% Industrial Methylated Spirits (IMS) is used for this. But with specimens that have dried out completely in their jars (as mine had), they can’t be put straight into 80% IMS, as this would damage them. Instead, they need to be stepped up in gradual stages to 80%, starting with a low alcohol concentration.

But before my critters could go into their alcohol, they had to be treated for the air inside them that was causing them to float. This was done in a dessication chamber attached to a vacuum pump, which pulls the air out of the chamber, and removes air bubbles from the body cavity of the specimen.

P1110882

Unfortunately, while quite a lot of air did come out of my specimens, they failed to sink totally, even after several treatments in the vacuum. As the frog will be mounted on a glass backing plate anyway, this isn’t too important.

While waiting for my specimens to work their way up the alcohol ladder, I also attempted to make a lid for the frog’s jar by cutting a circular piece of glass from a sheet…after three failed attempts, I resorted to a ready-cut lid! Which is cheating, but I did at least get the principle of how it should work, and why mine went wrong. I also drilled a hole in my shiny new lid, which can be used to top up the alcohol in the finished jar in the future if the level gets too low, without having to go to the hassle of removing the lid (which will be well sealed).

I also started a new project, which is this little chap:

P1110888

He is a small monitor lizard (of the genus Varanus), and he has clearly been squashed into a jar that was too small for him, as he is rather hunched and his tail curls around quite a lot. His main problem, however, was that the fluid level in his jar was far too low, as you can see above. He was still fairly flexible, so I didn’t need to put him into Decon-90, but instead moved him into a nice, new, (and much larger) jar and doused him in his first batch of IMS.

Tomorrow I will finish moving the frog and the lizards up the alcohols, mount the frog on his backplate, and attempt to re-attach some stray crab legs. Can’t wait!

Fun With Fluids

So, this week I am attending an excellent course in fluid preservation of natural history specimens run by Simon Moore. Handily, it is also being held at the Horniman this time round, so I don’t even have to go out of my way!

Day one featured a morning of lectures on the various problems that face fluid preserved specimens, including drying out, lipid contamination, and incomplete fixation. There was a lot of information to take in, and a lot of chemistry involved – I haven’t studied organic chemistry since university so I’m a bit rusty, and I can’t say I took in all of the details of fixative formulae and chemical reactions! But the theory was followed by practical, which always makes things clearer.

The practical side of the course involves rehydrating some completely dried out specimens. The first step was to choose specimens – I managed to bag myself a small, rather mouldy tree frog (of the genus Rhacophorus), and a jar of three crabs (labelled as Portunus depurator, now called Liocarcinus depurator, the harbour crab).

P1110818

My poor sad looking frog

P1110830

P1110819

A jar of dry crabs

P1110826

The first step in rehydration is to bathe the specimens in a dilute solution of Decon-90 (which is usually used as a surface-active cleaning agent and radioactive decontaminant, but is also excellent for rehydrating dried tissues). I decanted the specimens from their jars into beakers, and placed them on hotplates to warm the Decon-90 solution slightly, which catalyses the reaction.

P1110831

P1110832

And in their baths they will stay overnight, as my specimens remain quite stiff and unreponsive so far. Tomorrow they will be treated in a mild vacuum to remove the air pockets that are causing them to float at the moment.

While waiting impatiently for our specimens to show signs of improvement, Simon showed us some techniques for glass cutting, which is important for making new lids for specimen jars, and also showed us how to drill holes in jars to top up fluids without having to remove the lid (which is often quite a chore if the jar has been well sealed).

Charlotte demonstrating how to drill holes in glass

Charlotte demonstrates how to drill holes in glass

By the end of the week I hope my little critters will look plump, healthy and lifelike again! I will keep you updated on progress…